
Grosh Digital here with your tech tip.
Today we will be going over using the Demo Slides from Grosh Digital. The Demo Slides are a great way to test before you rent. Let’s get started.
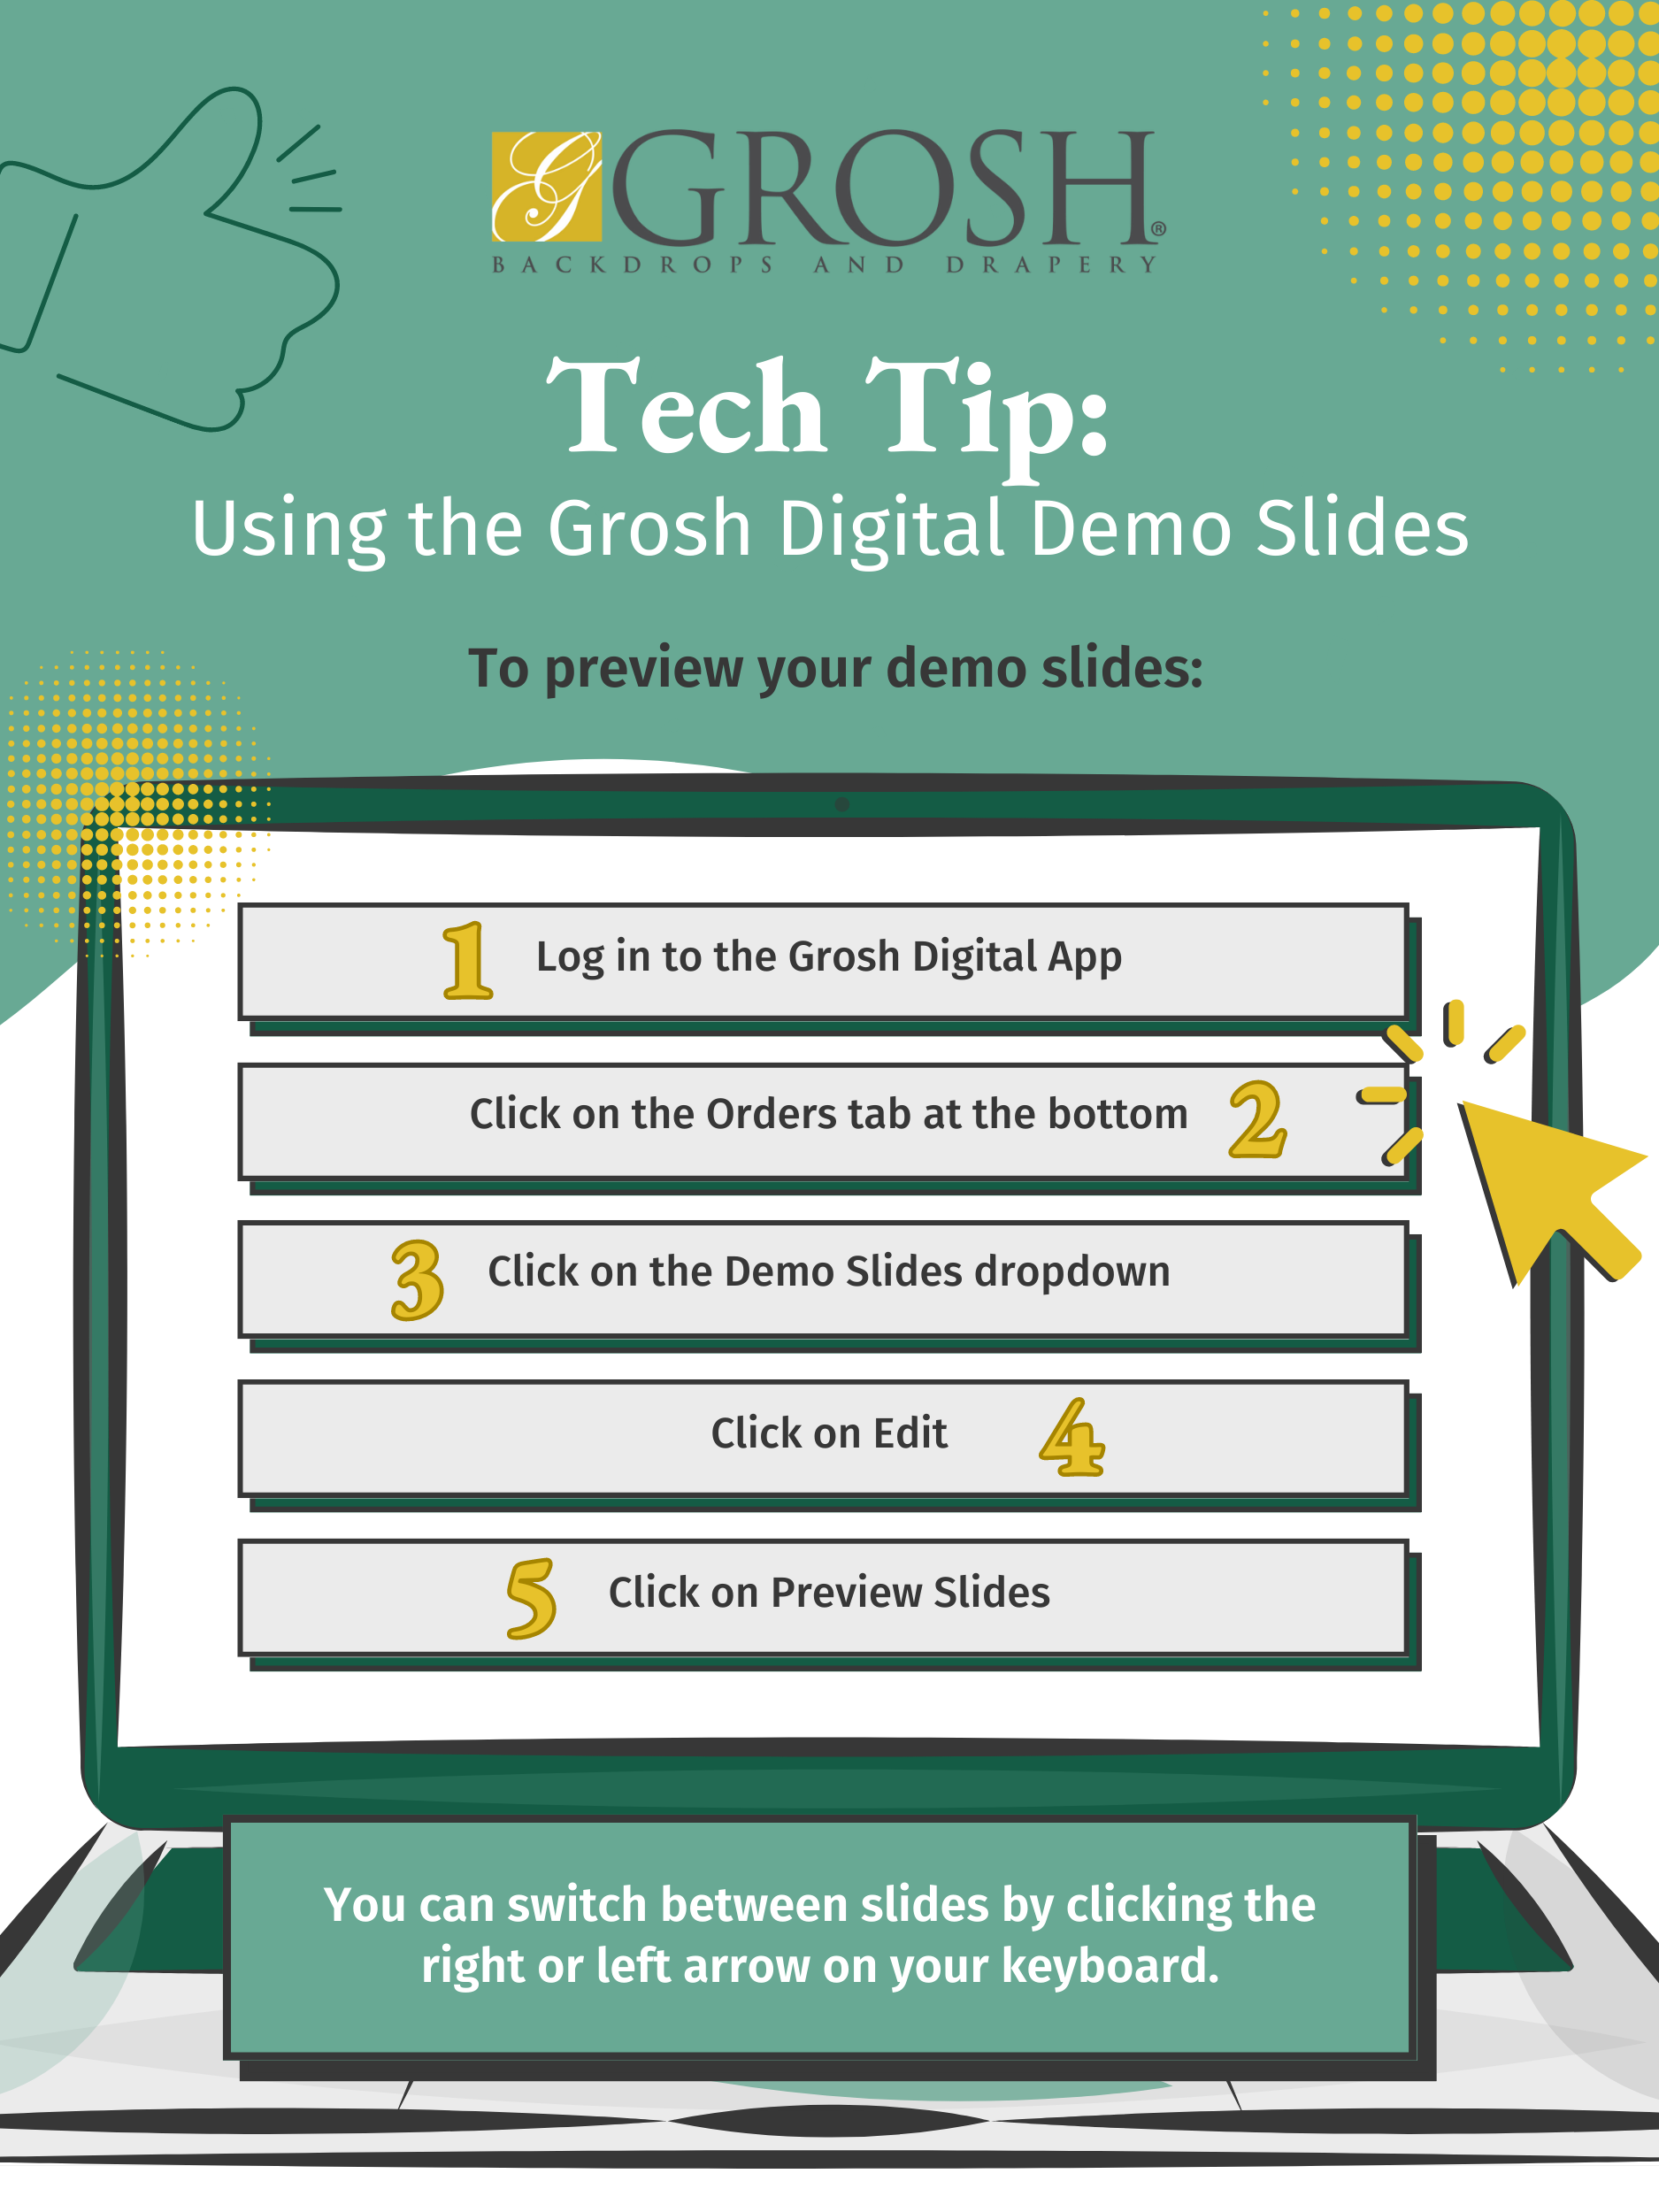
Login or Create an Account
Go to the Grosh Digital website and click login. Create an account by clicking the registration button. Enter in your name, your email address, and a password, then click Register.
Download the Grosh Digital App
Now we need to download the Grosh Digital App.
- Click on Download App.
- Now choose the appropriate app for your operating system, if you are on MAC or Windows, and the download should start.
- Install the app on your computer, and then open the app.
- Once the app is open, enter your email and password, and log in.
Orders Tab
Once logged in, you will see your account.
- Click on the Orders tab at the bottom.
- Click on the Demo Slides dropdown.
- Then click on Edit.
In the editor, you can see the order of your demo slides. In the editor, you can copy them, hide them, move your slides up or down, and the Grosh Digital App even allows you to upload your own slide.
Preview Your Digital Demo Slides
Once you are finished editing your slides, it is time to preview your show. But before we do that, let’s get connected to our projector.
Connect to Your Projector
In order to get connected to your projector, you are going to need a few things. Your computer, your projector, and a cable. For this demonstration, I will be using an HDMI cable.
- Start by connecting one end of your HDMI cable to your computer, and the other end to your projector.
- Turn your projector on.
- Go to your computer, and go to your Display Settings. (Make sure that your Display Settings are set to mirror displays.)
- In the Grosh Digital Media Player, we can now preview our show. Click on the Preview Show button.
You can switch between slides by clicking the right or left arrow on your keyboard. Please note that, since these are only demo slides, only the Activate button will remove watermarks on your projected backdrops.
When you have placed an order with Grosh Digital, your order will appear in the Order section. Click on the Activate button and the rental duration, for which your ordered images will begin to count down. You should now be up and projecting.
This has been your Grosh Digital tech tip. For more info, feel free to email us at info@groshdigital.com